
Setting Up Combell Mail on Your iPhone: A Detailed Guide
Managing your email on the go has never been easier, especially when you use Combell Mail on your iPhone. This guide will walk you through the process of setting up your Combell Mail account on your iPhone, ensuring that you stay connected and organized no matter where you are.
Step 1: Accessing the Settings

Before you begin, make sure that your iPhone is updated to the latest iOS version. This ensures that you have access to the latest features and security updates. To start the setup process, go to your iPhone’s “Settings” app.
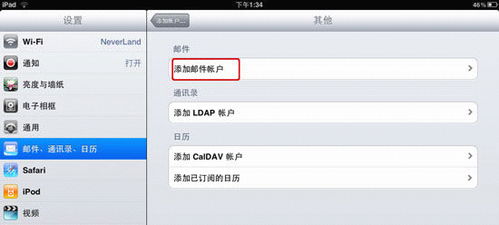
Step 2: Adding a New Account
Scroll down and tap on “Mail,” then select “Accounts.” Next, tap on “Add Account” and choose “Other.” From the options provided, select “Add Mail Account.”
Step 3: Entering Your Combell Mail Details
Enter your full Combell Mail email address and password. Make sure that you have these details readily available as you will need them to proceed. After entering your credentials, tap “Next.” Your iPhone will then attempt to verify your account.
Step 4: Configuring Your Mail Settings
Once your account is verified, you will be prompted to configure your mail settings. Here, you can choose the type of email account you have (IMAP or POP). For most users, IMAP is the recommended option as it allows you to access your emails from multiple devices. Select “IMAP” and enter the following details:
| Setting | Value |
|---|---|
| Username | Your full Combell Mail email address |
| Password | Your Combell Mail password |
| Server | imap.combell.net |
| Use SSL | On |
| Port | 993 |
For outgoing mail settings, enter the following details:
| Setting | Value |
|---|---|
| Username | Your full Combell Mail email address |
| Password | Your Combell Mail password |
| Server | smtp.combell.net |
| Use SSL | On |
| Port | 465 |
After entering these details, tap “Next.” Your iPhone will then test the settings to ensure that they are correct.
Step 5: Finishing the Setup
Once the settings are verified, you will see a confirmation message. Tap “Done,” and your Combell Mail account will be added to your iPhone. You can now access your emails, send messages, and manage your contacts directly from your iPhone.
Step 6: Customizing Your Mail Experience
After setting up your Combell Mail account, you can customize your mail experience by adjusting various settings. For example, you can:
- Change the default email signature
- Set up email notifications
- Organize your emails into folders
- Configure your email signature
These settings can be accessed by going to “Settings” > “Mail,” then selecting your Combell Mail account and tapping on “Account Details.” From there, you can modify the settings to your liking.
Step 7: Troubleshooting Common Issues
While setting up your Combell Mail account, you may encounter some issues. Here are some common problems and their solutions:
- Problem: Your iPhone cannot verify your