
Installing Google Chrome OS on an OP Laptop: A Comprehensive Guide
Are you looking to install Google Chrome OS on your OP laptop? If so, you’ve come to the right place. This guide will walk you through the entire process, from preparing your laptop to the final steps of installation. Let’s dive in!
Understanding Chrome OS

Before we begin, it’s essential to understand what Chrome OS is. Developed by Google, Chrome OS is an operating system based on the Linux kernel. It’s designed to be fast, simple, and secure, with a focus on cloud computing. Unlike traditional operating systems like Windows or macOS, Chrome OS relies heavily on web applications and cloud services.
Compatibility Check
Not all laptops are compatible with Chrome OS. Before you proceed, ensure that your OP laptop meets the following requirements:
| Minimum Hardware Requirements | Description |
|---|---|
| Processor | Intel Celeron, Pentium, or AMD A4 or better |
| RAM | 4GB or more |
| Storage | 16GB or more |
| Display | 1366×768 resolution or higher |
| Graphics | Intel HD Graphics 4000 or better |
Check your laptop’s specifications to ensure it meets these requirements. If it doesn’t, you may need to upgrade your hardware or consider a different laptop.
Downloading the Chrome OS Image
Once you’ve confirmed that your laptop is compatible, the next step is to download the Chrome OS image. You can download it from the official Chrome OS website. Here’s how:
- Go to https://www.chromium.org/getting-chromium-source.
- Scroll down to the “Chrome OS” section and click on “Download Chrome OS image” under the version you want to install.
- Select your laptop’s architecture (32-bit or 64-bit) and click “Download” to start the download.
Save the downloaded file to a location on your computer where you can easily access it.
Creating a Bootable USB Drive
Now that you have the Chrome OS image, you need to create a bootable USB drive. You can use a tool like Rufus or balenaEtcher to do this. Here’s how to create a bootable USB drive using Rufus:
- Download Rufus from https://rufus.ie/.
- Connect a USB drive to your computer.
- Open Rufus and select your USB drive from the “Device” dropdown menu.
- Under “Boot selection,” click “Select” and choose the Chrome OS image you downloaded earlier.
- Click “Start” to begin the process. Rufus will format the USB drive and copy the Chrome OS image to it.
Once the process is complete, you now have a bootable USB drive with Chrome OS.
Boot from USB Drive
With your bootable USB drive ready, it’s time to boot your OP laptop from it. Here’s how:
- Insert the USB drive into your laptop.
- Restart your laptop and press the key to enter the BIOS or UEFI settings (usually F2, F10, or DEL). The key may vary depending on your laptop’s manufacturer.
- Locate the boot order or boot priority settings and change the order so that the USB drive is selected as the first boot device.
- Save the changes and exit the BIOS/UEFI settings.
- Your laptop will now boot from the USB drive and start the Chrome OS installation process.
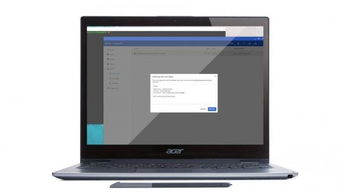
Installing Chrome OS
Follow the on-screen instructions to install Chrome OS. The process is straightforward and should take about