
Customizing IKEA Pax Doors: A Comprehensive Guide
Are you looking to add a personal touch to your IKEA Pax wardrobe? Customizing the Pax doors is a fantastic way to achieve a unique and tailored look. In this article, we will delve into the process of sawing IKEA Pax doors to size, providing you with a detailed and multi-dimensional introduction.
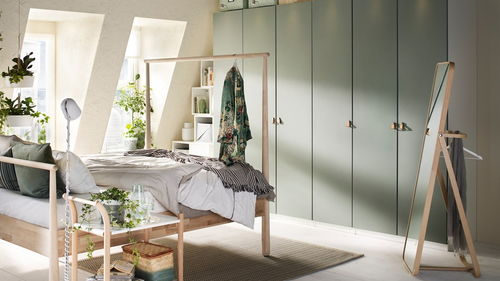
Understanding the IKEA Pax System

The IKEA Pax system is a versatile and modular wardrobe solution that allows you to create a custom storage space in your home. The system consists of various components, including frames, shelves, drawers, and doors. The doors are available in standard sizes, but customizing them to fit your specific needs can enhance the overall look and functionality of your wardrobe.
Materials and Tools Needed
Before you begin sawing your IKEA Pax doors, gather the following materials and tools:
| Material | Tool |
|---|---|
| IKEA Pax doors | Hand saw or circular saw |
| Miter box | Sanding paper |
| Wood glue | Wood screws |
| Screwdriver | Paint or varnish (optional) |
Measuring and Marking the Doors

Accurate measurements are crucial when customizing your IKEA Pax doors. Use a tape measure to determine the desired width and height of the door. Once you have the measurements, mark them on the door using a pencil or a marking pen. Ensure that the marks are clear and visible to avoid mistakes during the sawing process.
Sawing the Doors
Choose a hand saw or a circular saw to cut the door to size. If you’re using a hand saw, place the door on a stable surface and hold it firmly while sawing. For a circular saw, secure the door to a workbench and follow the cutting line carefully. Always wear safety goggles and gloves to protect yourself from any potential accidents.
Finishing the Cut
After sawing the door to size, use sandpaper to smooth out any rough edges. This will ensure that the door fits properly into the wardrobe frame and drawers. If desired, apply wood glue to the edges and screws to reinforce the structure. Allow the glue to dry completely before proceeding to the next step.
Painting or Varnishing
Customize the look of your Pax doors by painting or varnishing them. Choose a color that complements your home’s decor. Apply the paint or varnish evenly using a brush or a roller. Allow the door to dry completely before installing it in the wardrobe.
Installing the Customized Doors
Once your Pax doors are ready, it’s time to install them. Follow the IKEA Pax assembly instructions to attach the doors to the wardrobe frame. Make sure the doors are aligned properly and that they open and close smoothly. Adjust the hinges if necessary to ensure a perfect fit.
Conclusion
Customizing your IKEA Pax doors is a rewarding project that can transform the look and functionality of your wardrobe. By following this comprehensive guide, you can saw your Pax doors to size, finish them to your liking, and install them with ease. Enjoy the process and the unique, personalized storage solution you’ve created for your home.