
Mastering SwiftUI: A Comprehensive Guide to Writing Code in Swift
Are you ready to dive into the world of SwiftUI? If so, you’ve come to the right place. SwiftUI is a powerful and intuitive UI toolkit for iOS, macOS, watchOS, and tvOS. By using SwiftUI, you can create beautiful and responsive user interfaces with ease. In this article, I’ll walk you through the basics of SwiftUI, its features, and how to get started with your first project.
Understanding SwiftUI

Before we dive into the code, let’s take a moment to understand what SwiftUI is and why it’s so popular.
SwiftUI is a declarative UI toolkit that allows you to build user interfaces using a simple and intuitive syntax. It’s designed to be easy to learn and use, making it a great choice for both beginners and experienced developers.
One of the key features of SwiftUI is its declarative nature. This means that you describe what you want your UI to look like, and SwiftUI takes care of the rest. This makes it easier to create complex UIs without having to write a lot of boilerplate code.
Another great feature of SwiftUI is its support for SwiftUI previews. Previews allow you to see what your UI will look like at runtime, without having to run your app. This makes it easier to iterate on your UI design and catch any issues early on.
Setting Up Your Environment
Before you can start writing SwiftUI code, you’ll need to set up your development environment. Here’s a step-by-step guide to get you started:
- Install Xcode: Xcode is the primary IDE for iOS and macOS development. You can download it for free from the Mac App Store.
- Open Xcode: Once Xcode is installed, open it and create a new project.
- Select SwiftUI App: When creating a new project, choose the SwiftUI App template.
- Configure Your Project: Fill in the project details, such as your team, organization identifier, and product name.
- Run Your App: Click the Run button to build and run your app on the simulator or a connected device.
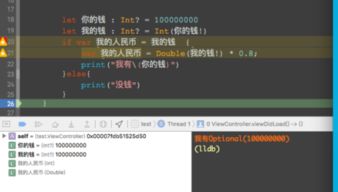
Writing Your First SwiftUI View

Now that you have your environment set up, let’s write your first SwiftUI View. A View is the building block of a SwiftUI app. It represents a single UI element, such as a button, text field, or image.
Here’s a simple example of a SwiftUI View that displays a text label:
Text("Hello, SwiftUI!")This code creates a View that displays the text “Hello, SwiftUI!” on the screen. You can add more Views to create a more complex UI.
Using SwiftUI Previews
One of the great features of SwiftUI is its support for previews. Previews allow you to see what your UI will look like at runtime, without having to run your app.
Here’s an example of how to create a preview for a SwiftUI View:
struct ContentView: View { var body: some View { Text("Hello, SwiftUI!") }}struct ContentView_Previews: PreviewProvider { static var previews: some View { ContentView() }}In this example, we’ve added a new struct called ContentView_Previews that conforms to the PreviewProvider protocol. This allows us to create a preview of ContentView.
Working with SwiftUI State
One of the key features of SwiftUI is its support for state. State allows you to store and modify data within your Views.
Here’s an example of how to use state in a SwiftUI View:
struct ContentView: View { @State private var counter = 0 var body: some View { VStack { Text("Counter: (counter)") Button("Increment") { counter += 1 } } }}In this example, we’ve added a new state variable called counter. We also added a Button that increments the counter when tapped.
Using SwiftUI Modifiers
SwiftUI modifiers are functions that you can apply to Views to change their appearance or behavior. There are many built-in modifiers available, and you can also create your own.
Here’s an example of how to use a built-in modifier called .padding() to add padding to a View:
Text("Hello, SwiftUI!") .padding()